My auto-answer:
https://www.thethingsnetwork.org/forum/t/big-esp32-sx127x-topic-part-1/10247/38
Onboard lithium battery charge and discharge circuit, The orange LED lights will go out when the battery is full , only provide the basic lithium battery charging and discharge function, can not monitor the battery temperature and power, if your battery is not purchased in our shop, Please pay attention to the battery positive and negative, wrong operation may explode.
@mrme @Verkehrsrot OK so I did that for ESP deepSleep and using console to power or not the OLED screen. But now I’m running into a deeper problem
Each time I sleep and wake up, it seems the program restarts from scratch (as counter displayed on screen is not incremented, and ABP packet counter is not incremented neither). Here is the sketch I use:
/* **************************************************************
* Arduino sketch
* Author: Martijn Quaedvlieg / Jan de Laet (january 2017)
* Generated with Generate script by Jan de Laet
* Modified 12-1-2018 by Pierre Gorissen for use with
* U8X8 OLED + SX1276
* Modified 01-2-2018 by Nicolas Derive to use measurements from
* BME280 sensor and display them on the screen
* *************************************************************/
#include <SPI.h>
#define BUILTIN_LED 25
// define the activation method ABP or OTAA
#define ACT_METHOD_ABP
// show debug statements; comment next line to disable debug statements
#define DEBUG
#define CFG_eu868
/* **************************************************************
* keys for device (removed for forum posting)
* *************************************************************/
static const uint8_t PROGMEM NWKSKEY[16] = { };
static const uint8_t PROGMEM APPSKEY[16] = { };
static const uint32_t DEVADDR = ;
/* **************************************************************
* user settings
* *************************************************************/
// Schedule TX every this many seconds (might become longer due to duty
// cycle limitations).
// const unsigned TX_INTERVAL = 240; // unused
unsigned int countero = 0;
unsigned int serial_act = 0;
unsigned long starttime;
unsigned long cycle_length = TX_INTERVAL * 1000UL; // cycle in secs, currently unused;
// Uses LMIC libary by Thomas Telkamp and Matthijs Kooijman (https://github.com/matthijskooijman/arduino-lmic)
// Pin mappings based upon PCB Doug Larue
#include <lmic.h>
#include <hal/hal.h>
// Declare the job control structures
static osjob_t sendjob;
// These callbacks are only used in over-the-air activation, so they are
// left empty when ABP (we cannot leave them out completely unless
// DISABLE_JOIN is set in config.h, otherwise the linker will complain).
#ifdef ACT_METHOD_ABP
void os_getArtEui (u1_t* buf) { }
void os_getDevEui (u1_t* buf) { }
void os_getDevKey (u1_t* buf) { }
#else
void os_getArtEui (u1_t* buf) { memcpy_P(buf, APPEUI, 8);}
void os_getDevEui (u1_t* buf) { memcpy_P(buf, DEVEUI, 8);}
void os_getDevKey (u1_t* buf) { memcpy_P(buf, APPKEY, 16);}
#endif
/* **************************************************************
* Pin mapping
* *************************************************************/
const lmic_pinmap lmic_pins = {
.nss = 18,
.rxtx = LMIC_UNUSED_PIN,
.rst = 14,
.dio = {26, 33, 32},
};
/* **************************************************************
* OLED setup
* *************************************************************/
#include "SSD1306.h"
#include "images.h"
// the OLED used
SSD1306 display(0x3c, 21, 22);
void logo(){
display.clear();
display.drawXbm(0,5,logo_width,logo_height,logo_bits);
display.display();
}
/* **************************************************************
* Sensor setup
* *************************************************************/
#include <Wire.h>
//#include "BlueDot_BME280.h"
#include <Seeed_BME280.h>
//BlueDot_BME280 bme280 = BlueDot_BME280();
BME280 bme;
// sensor variables
float tempC = 0.0;
float pressure = 0.0;
float humidity = 0.0;
float altitudeMeter = 0.0;
// meteofrance.fr : "En moyenne, la pression atmosphérique diminue de 1 hPa tous les 8 mètres"
#define ALT 44
#define COR (ALT/8.0)
unsigned int counter = 0;
// data to send
static uint8_t dataTX[8];
/* **************************************************************
* setup
* *************************************************************/
void setup() {
//Set baud rate
Serial.begin(115200);
// Wait (max 10 seconds) for the Serial Monitor
while ((!Serial) && (millis() < 10000)){ }
init_node();
init_sensor();
pinMode(16,OUTPUT);
pinMode(2,OUTPUT);
if (Serial) {
serial_act = 1;
digitalWrite(16, LOW); // set GPIO16 low to reset OLED
delay(50);
digitalWrite(16, HIGH); // while OLED is running, must set GPIO16 in high
display.init();
display.flipScreenVertically();
display.setFont(ArialMT_Plain_10);
logo();
delay(1500);
}
else {
digitalWrite(16, LOW);
}
}
starttime = millis();
}
/* **************************************************************
* loop
* *************************************************************/
void loop() {
do_sense();
// check if need to send
build_data();
do_send();
// delay(240000);
// if ((millis() - starttime) > cycle_length) { build_data(); do_send(); starttime = millis(); } // don't know how to rewrite this with ESP deepsleep
Serial.println("Bring ESP to sleep mode 5minutes");
/* 5e6 is 5x10^6 microseconds */
ESP.deepSleep(240e6);
}
/* **************************************************************
* sensor code, typical would be init_sensor(), do_sense(), build_data()
* *************************************************************/
/* **************************************************************
* init the sensor
* *************************************************************/
void init_sensor() {
while (!bme.init()){
Serial.print("BME280 error!");
delay(2000);
}
}
/* **************************************************************
* do the reading
* *************************************************************/
void do_sense() {
// Read temperature as Celsius (the default)
tempC = bme.getTemperature();
// Read humidity
humidity = bme.getHumidity();
// Read the pressure in hPa
pressure = bme.getPressure();
// Read the altitude in Meters
altitudeMeter = bme.calcAltitude(pressure);
pressure = pressure/100;
// Check if any reads failed and exit early (to try again).
if (isnan(pressure) || isnan(tempC) || isnan(humidity) || isnan(altitudeMeter)) {
#ifdef DEBUG
Serial.println("Failed to read from BME280 sensor!");
#endif
return;
}
if (serial_act == 1) {
display.clear();
display.setTextAlignment(TEXT_ALIGN_LEFT);
display.setFont(ArialMT_Plain_10);
//u8x8.setCursor(0, 3);
//u8x8.printf("Temp: %.1fC", tempC);
String tempS = "Température : " + String(tempC) + "°C";
display.drawString(0, 1, tempS);
String humidityS = "Humidité : " + String(humidity) + "%";
display.drawString(0, 12, humidityS);
//u8x8.setCursor(0, 5);
// u8x8.printf("Press: %.1fhPa", pressure);
String presS = "Pression : " + String(pressure) + "hPa";
display.drawString(0, 23, presS);
String alt = "Altitude : " + String(altitudeMeter) + "m";
display.drawString(0, 34, alt);
String counters = "Paquets envoyés : " + String(countero);
display.drawString(0, 45, counters);
display.display();
}
#ifdef DEBUG
Serial.print(F(" temp Celcius:"));
Serial.print(tempC);
Serial.print(F(" humidity:"));
Serial.print(humidity);
Serial.print(F(" pressure:"));
Serial.print(pressure);
Serial.print(F(" altitude (meters):"));
Serial.print(altitudeMeter);
Serial.println(F(""));
#endif
delay(2000);
}
/* **************************************************************
* build data to transmit in dataTX
*
* Suggested payload function for this data
*
* function Decoder(bytes, port) {
* var temp = parseInt(bytes[0] + (bytes[1] << 8 ) - 500) / 10 ;
* var humidity = parseInt(bytes[2] + (bytes[3] << 8 ) ;
* var pressure = parseInt(bytes[4] + (bytes[5] << 8 )) / 10;
* // don't know why, but in my case the altitude was about 90 meter to low, so added 90 meters
* var altitude = parseInt(bytes[6] + (bytes[7] << 8 ) - 100) / 10;
* return { temp: temp,
* humidity: humidity,
* pressure: pressure,
* altitude: altitude
* };
* }
* *************************************************************/
void build_data() {
int dtempC = (tempC + 50) * 10;
int dpressure = pressure * 10;
int daltitude = (altitudeMeter + 100) * 10;
dataTX[0] = dtempC;
dataTX[1] = dtempC >> 8;
dataTX[2] = int(humidity);
dataTX[3] = int(humidity) >> 8;
dataTX[4] = dpressure;
dataTX[5] = dpressure >> 8;
dataTX[6] = daltitude;
dataTX[7] = daltitude >> 8;
}
/* **************************************************************
* radio code, typical would be init_node(), do_send(), etc
* *************************************************************/
/* **************************************************************
* init the Node
* *************************************************************/
void init_node() {
#ifdef VCC_ENABLE
// For Pinoccio Scout boards
pinMode(VCC_ENABLE, OUTPUT);
digitalWrite(VCC_ENABLE, HIGH);
delay(1000);
#endif
// LMIC init
os_init();
// Reset the MAC state. Session and pending data transfers will be discarded.
LMIC_reset();
#ifdef ACT_METHOD_ABP
// Set static session parameters. Instead of dynamically establishing a session
// by joining the network, precomputed session parameters are be provided.
#ifdef PROGMEM
// On AVR, these values are stored in flash and only copied to RAM
// once. Copy them to a temporary buffer here, LMIC_setSession will
// copy them into a buffer of its own again.
uint8_t appskey[sizeof(APPSKEY)];
uint8_t nwkskey[sizeof(NWKSKEY)];
memcpy_P(appskey, APPSKEY, sizeof(APPSKEY));
memcpy_P(nwkskey, NWKSKEY, sizeof(NWKSKEY));
LMIC_setSession (0x1, DEVADDR, nwkskey, appskey);
#else
// If not running an AVR with PROGMEM, just use the arrays directly
LMIC_setSession (0x1, DEVADDR, NWKSKEY, APPSKEY);
#endif
#if defined(CFG_eu868)
// Set up the channels used by the Things Network, which corresponds
// to the defaults of most gateways. Without this, only three base
// channels from the LoRaWAN specification are used, which certainly
// works, so it is good for debugging, but can overload those
// frequencies, so be sure to configure the full frequency range of
// your network here (unless your network autoconfigures them).
// Setting up channels should happen after LMIC_setSession, as that
// configures the minimal channel set.
// NA-US channels 0-71 are configured automatically
LMIC_setupChannel(0, 868100000, DR_RANGE_MAP(DR_SF12, DR_SF7), BAND_CENTI); // g-band
LMIC_setupChannel(1, 868300000, DR_RANGE_MAP(DR_SF12, DR_SF7B), BAND_CENTI); // g-band
LMIC_setupChannel(2, 868500000, DR_RANGE_MAP(DR_SF12, DR_SF7), BAND_CENTI); // g-band
LMIC_setupChannel(3, 867100000, DR_RANGE_MAP(DR_SF12, DR_SF7), BAND_CENTI); // g-band
LMIC_setupChannel(4, 867300000, DR_RANGE_MAP(DR_SF12, DR_SF7), BAND_CENTI); // g-band
LMIC_setupChannel(5, 867500000, DR_RANGE_MAP(DR_SF12, DR_SF7), BAND_CENTI); // g-band
LMIC_setupChannel(6, 867700000, DR_RANGE_MAP(DR_SF12, DR_SF7), BAND_CENTI); // g-band
LMIC_setupChannel(7, 867900000, DR_RANGE_MAP(DR_SF12, DR_SF7), BAND_CENTI); // g-band
LMIC_setupChannel(8, 868800000, DR_RANGE_MAP(DR_FSK, DR_FSK), BAND_MILLI); // g2-band
// TTN defines an additional channel at 869.525Mhz using SF9 for class B
// devices' ping slots. LMIC does not have an easy way to define set this
// frequency and support for class B is spotty and untested, so this
// frequency is not configured here.
#elif defined(CFG_us915)
// NA-US channels 0-71 are configured automatically
// but only one group of 8 should (a subband) should be active
// TTN recommends the second sub band, 1 in a zero based count.
// https://github.com/TheThingsNetwork/gateway-conf/blob/master/US-global_conf.json
LMIC_selectSubBand(1);
#endif
#if defined(DEBUG)
LMIC_disableChannel(1);
LMIC_disableChannel(2);
LMIC_disableChannel(3);
LMIC_disableChannel(4);
LMIC_disableChannel(5);
LMIC_disableChannel(6);
LMIC_disableChannel(7);
LMIC_disableChannel(8);
#endif
// Enable data rate adaptation
// LMIC_setAdrMode(1);
// Disable link check validation
LMIC_setLinkCheckMode(0);
// TTN uses SF9 for its RX2 window.
LMIC.dn2Dr = DR_SF9;
// Set data rate and transmit power (note: txpow seems to be ignored by the library)
LMIC_setDrTxpow(DR_SF7,14);
#endif
#ifdef ACT_METHOD_OTAA
// got this fix from forum: https://www.thethingsnetwork.org/forum/t/over-the-air-activation-otaa-with-lmic/1921/36
LMIC_setClockError(MAX_CLOCK_ERROR * 1 / 100);
#endif
}
/* **************************************************************
* send the message
* *************************************************************/
void do_send() {
Serial.print(millis());
Serial.print(F(" Sending.. "));
send_message(&sendjob);
// wait for send to complete
Serial.print(millis());
Serial.print(F(" Waiting.. "));
while ( (LMIC.opmode & OP_JOINING) or (LMIC.opmode & OP_TXRXPEND) ) { os_runloop_once(); }
Serial.print(millis());
Serial.println(F(" TX_COMPLETE"));
countero++;
}
/* *****************************************************************************
* send_message
* ****************************************************************************/
void send_message(osjob_t* j) {
// Check if there is not a current TX/RX job running
if (LMIC.opmode & OP_TXRXPEND) {
Serial.println(F("OP_TXRXPEND, not sending"));
} else {
// Prepare upstream data transmission at the next possible time.
LMIC_setTxData2(1, dataTX, sizeof(dataTX), 0);
Serial.println(F("Packet queued"));
}
}
/*******************************************************************************/
void onEvent (ev_t ev) {
switch (ev) {
case EV_SCAN_TIMEOUT:
Serial.println(F("EV_SCAN_TIMEOUT"));
break;
case EV_BEACON_FOUND:
Serial.println(F("EV_BEACON_FOUND"));
break;
case EV_BEACON_MISSED:
Serial.println(F("EV_BEACON_MISSED"));
break;
case EV_BEACON_TRACKED:
Serial.println(F("EV_BEACON_TRACKED"));
break;
case EV_JOINING:
Serial.println(F("EV_JOINING"));
break;
case EV_JOINED:
Serial.println(F("EV_JOINED"));
// Disable link check validation (automatically enabled
// during join, but not supported by TTN at this time).
LMIC_setLinkCheckMode(0);
break;
case EV_RFU1:
Serial.println(F("EV_RFU1"));
break;
case EV_JOIN_FAILED:
Serial.println(F("EV_JOIN_FAILED"));
break;
case EV_REJOIN_FAILED:
Serial.println(F("EV_REJOIN_FAILED"));
break;
case EV_TXCOMPLETE:
Serial.println(F("EV_TXCOMPLETE (includes waiting for RX windows)"));
if (LMIC.dataLen) {
// data received in rx slot after tx
Serial.print(F("Data Received: "));
Serial.write(LMIC.frame+LMIC.dataBeg, LMIC.dataLen);
Serial.println();
}
// schedule next transmission
// os_setTimedCallback(&sendjob, os_getTime() + sec2osticks(TX_INTERVAL), send_message);
break;
case EV_LOST_TSYNC:
Serial.println(F("EV_LOST_TSYNC"));
break;
case EV_RESET:
Serial.println(F("EV_RESET"));
break;
case EV_RXCOMPLETE:
// data received in ping slot
Serial.println(F("EV_RXCOMPLETE"));
break;
case EV_LINK_DEAD:
Serial.println(F("EV_LINK_DEAD"));
break;
case EV_LINK_ALIVE:
Serial.println(F("EV_LINK_ALIVE"));
break;
default:
Serial.println(F("Unknown event"));
break;
}
}
Any idea how to fix this? Now that I’m using ABP, that’s a pain but not critical, but when I will switch to OTAA, it will be absolutely not doable to re-register each time…
Thanks for your help.
look here (Andreas Spiess channel) at 5‘20“
the ESP always reboots after deep sleep
you could save the counter in RTC memory
@ursm thanks for your answer. Do you have an idea how to do this? I try to save both my independant counter and the LoRa packet counter used by LMIC.
For OTAA, that won’t fix the fact that it will try to activate each time, won’t it?
for ABP: where did you save the counter. was the place “boot save”?
I don’t think so. how to save it in the RTC memory is shown in the video @6min
OTAA: your right; a boot will rung through setup (also explained in the video) and make a new join.
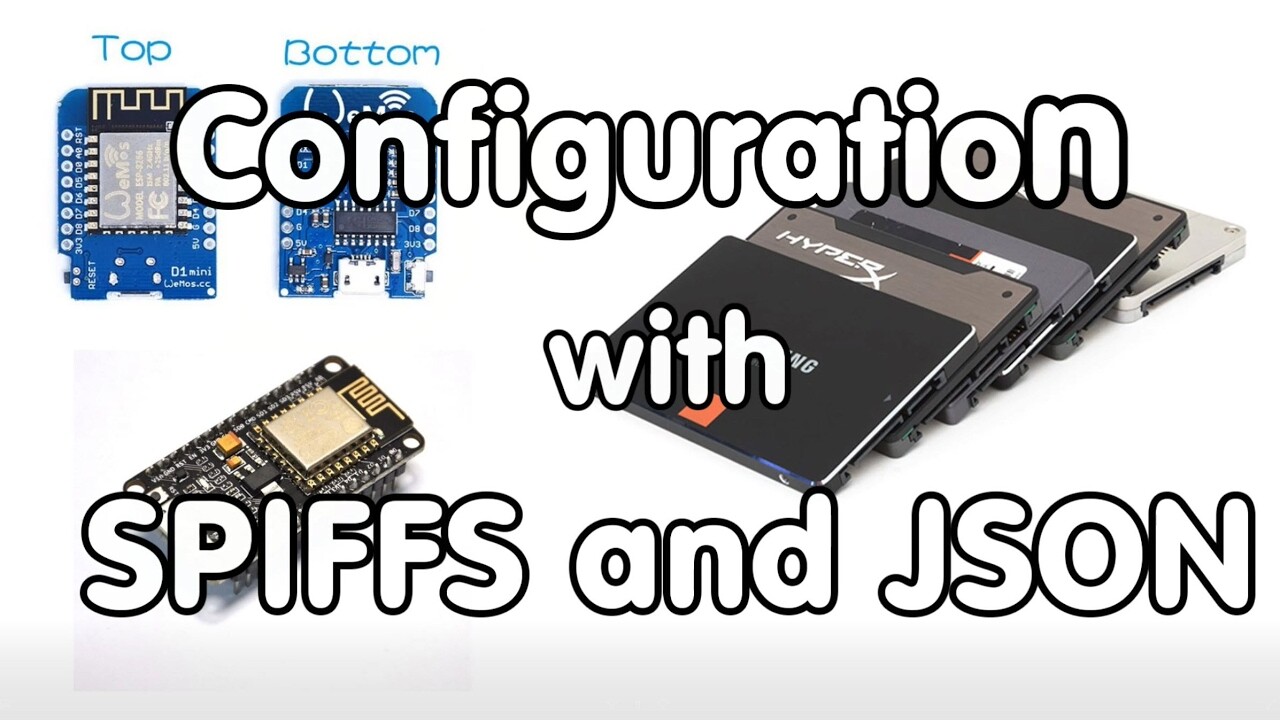
You can now use SPIFFS for ESP32 (Remembers things even after a powerdown)
This is great explanation of how it is used for the ESP8266
Check these out
The above thread also points to here
https://www.thethingsnetwork.org/forum/t/arduino-lmic-library-updated/1295/21
Would be interested in how you sort this in the end
As you can see in my sketch in a previous message, I don’t store any counter for ABP, as this is dealt by LMIC. Do you know how I can circumvent that problem to have a working counter? For the other variable, it’s like with Arduino’s, I don’t store it, only assigning a value to a variable.
please LOOK at the two supplied videos. the solution is in there
You may try tweaking the RX timing a little bit. This is possible with LMIC 1.5 arduino-2 using this code:
os_init(); // LMIC init
// Reset the MAC state. Session and pending data transfers will be discarded.
LMIC_reset();
// This tells LMIC to make the receive windows bigger, in case your clock is 1% faster or slower.
LMIC_setClockError(MAX_CLOCK_ERROR * 1 / 100);
I had problems with non working OTAA on my LoPy after rogrammed in C++, not Python, and could solve this problem by adding the above statement. Without OTAA doesn’t work on my LoPy. Since LoPy has same ESP32 CPU as Heltec/TTGO boards this issue may apply on those boards, too.
Thanks @Verkehrsrot. Unfortunately, it didn’t work for me. I continue to see activation packets show up at TTN, but get EV_JOIN_Failed down at my non-working Heltec node.
OK so I could store and recover a variable from RTC memory. I had a look there to deal with LMIC ABP packet number persistance (so it’s also possible to store it in EEPROM, and keep it without any power).
But I still don’t know how to keep OTAA session open when deep sleeping…
I’m also looking at switching on screen at each start, keep it lit for 10 seconds and then switch it off, but using digitalwrite on pin 16 that initialized it, but not switching it off when turning it low again…
Testing #ESP32 #LoRa Boards. Are they good? And what about the antennas?
note: Andy tested V1.0 of LiLyGO TTGO board. There is an improved version V2.0 available now. Shielded LoRa, better placed WiFi antenna, SDcard holder & battery management! https://de.aliexpress.com/store/product/2-St-cke-TTGO-LORA32-V2-0-868-433-Mhz-ESP32-LoRa-OLED-0-96-Zoll/2090076_32847443952.html
After an OTAA Join has finished, your node has the very same details you’d have for an ABP device. So: store the DevAddr, the secret session keys NwkSKey and AppSKey, the frequency settings, and keep track of both frame counters. See OTAA then ABP - #5 by arjanvanb.
In his nice article Andreas uses a spectrum analyzer to measure LoRa performance of the boards. Finally we have some more hard data on what several people had already noticed: the sub-optimal LoRa performance of these boards. (Nice to see that this topic was used as a source for the article and is linked back to.)
I had a nice talk with Andreas during The Things Conference where we also talked about these boards. Andreas has not yet tested the TTGO V2, which I expect will have better LoRa results because it uses a standard LoRa module. Andreas was interested in also testing the TTGO V2 (but don’t expect any results soon because he has many other interesting projects waiting for him).
In response to the video:
It’s not clear to me whether the Heltec V1 or V2 was tested.
The part where the poor PCB antenna placement of the Heltec is discussed appears to be the Heltec V2 because it has the PCB antenna on the bottom (which is not connected).
Included antenna’s:
The LoRa antenna’s included with all Heltec and TTGO boards are (helical) monopoles. For a monopole the ground plane acts as the dipole counterpoise element.
The size and location of the ground plane will have significant impact upon the antenna’s VSWR and gain.
For a more representative judgement of the included antennas, the ground plane aspects should have been included in the testing. While most users will probably use the antenna just ‘as is’ and not take care for any proper ground plane, proper judgement of the antenna’s performance can still only be done when using the antenna’s correctly (and monopoles require a good ground plane for proper functioning because the ground plane is the counterpoise, it’s the other half of the antenna).
A larger ground plane will lower the resonant frequency and widen the bandwidth.
Which is exactly what could be observed in the video when Andreas touched the antenna’s ground connection with his hand.
Typically antennas are designed on a counterpoise that is one wavelength in radius.
Significant performance reductions occur when the radius is a quarter-wave or less.
Source: Linx - Understanding Antenna Specifications and Operation
For better performance: the performance of true dipole antennas does not rely on the presence of a good ground plane because the counterpoise is already included in the antenna itself. Like this antenna which is a true dipole: 868Mhz 19.5cm SMA antenna
(Btw, his name is Andreas, not Andy.)
Hi all.
As I’m tinkering around with ioT and LoRa, I bought a Heltec Wifi LoRa 32 868-915MHz. So far the small example files in Sketch work just fine. However, I run into some issues when trying to get the ttn-abp.ino example to work. It started with LMIC 1.5.0+arduino-0 failing as some constants where not defiined in the scope. So I installed LMIC 1.5.0+arduino-1 which does seem to work. Currently I used Matthijs’ arduino-lmic-master library and removed the IBM LMIC library. But now I get an error that no one else in this forum seems to have reported (don’t laugh):
"Guru Meditation Error of type LoadProhibited occurred on core 1. Exception was unhandled."
Followed by a register dump and a reboot, starting all over again. It seems to go wrong when calling os_init() (LMIC method). Does anyone have a clue what this could be? Honestly, posts that Google found on the matter are not that clear to me…
Thanks in advance.
Jean-Pierre
Example of full Serial Monitor log:
Rebooting…
ets Jun 8 2016 00:22:57
rst:0xc (SW_CPU_RESET),boot:0x17 (SPI_FAST_FLASH_BOOT)
configsip: 0, SPIWP:0xee
clk_drv:0x00,q_drv:0x00,d_drv:0x00,cs0_drv:0x00,hd_drv:0x00,wp_drv:0x00
mode:DIO, clock div:1
load:0x3fff0010,len:4
load:0x3fff0014,len:812
load:0x40078000,len:0
load:0x40078000,len:10164
entry 0x400789f8
Starting
Guru Meditation Error of type LoadProhibited occurred on core 1. Exception was unhandled.
Register dump:
PC : 0x40080de9 PS : 0x00060330 A0 : 0x800d0ed6 A1 : 0x3ffcffb0
A2 : 0x00000005 A3 : 0x00000002 A4 : 0x00000000 A5 : 0x00000000
A6 : 0x00000000 A7 : 0x00060223 A8 : 0x3f402468 A9 : 0xffffffff
A10 : 0xffffffff A11 : 0x0000006c A12 : 0x00000008 A13 : 0x0000ff00
A14 : 0x00ff0000 A15 : 0xff000000 SAR : 0x0000001a EXCCAUSE: 0x0000001c
EXCVADDR: 0xffffffff LBEG : 0x400014fd LEND : 0x4000150d LCOUNT : 0xffffffff
Backtrace: 0x40080de9:0x3ffcffb0 0x400d0ed3:0x3ffcffd0 0x400d30ab:0x3ffcfff0 0x400d0be7:0x3ffd0010 0x400dfd9b:0x3ffd0050
Another thumbs up for Andreas’ videos here - they are always excellent.
What I like about this one, is that he clearly demonstrates the Antenna problems on all 3 boards. TBH, I don’t feel the need to know a minor difference between them, as they are all have relatively poor antenna performance - I think the message is that we all have to wait for a better version to come.
However the excellent summary does say what the advantages are, and for many that is fine)
Another thing I like, is that Andreas shows a very practical example of how the antenna’s performance can be affected by the nearness of other objects (e.g. hand).
I’m also pleased that Andreas refers to this thread, I take it as being for people to read further background information away from his blog (which is very generous of him).
Andreas, if you’re reading these posts, just saying thanks!
That better version (for LoRa at least) may already exist: TTGO V2 which uses a standard HPDTek LoRa module. But real measurements like in Andreas’ video will yet have to confirm that.
For how antenna performance can be affected, the above link to the Linx antenna article is an interesting read.
Have you tried the LMIC-Arduino
library version 1.5.0+arduino-2
and its included ttn-abp.ino
example when getting these results?
Have you used (and double checked) the exact same settings as described in the topic start?
Have you verified that all three parameters DEVADDR, NWKSKEY and APPSKEY are entered correctly and in the correct lsb/msb order?
I have a TTGO v2 and I am interested in running it for test as a single channel gateway.
Is this possible and which changes have to be made regarding the project https://github.com/kersing/ESP-1ch-Gateway-v5.0 ?
I am bit confused regarding the pin layout changes and not sure what is correct.
According to comments from Andreas’ below his video, it seems that he ordered a TTGO V2 to test it, so we will probably have these soon!